
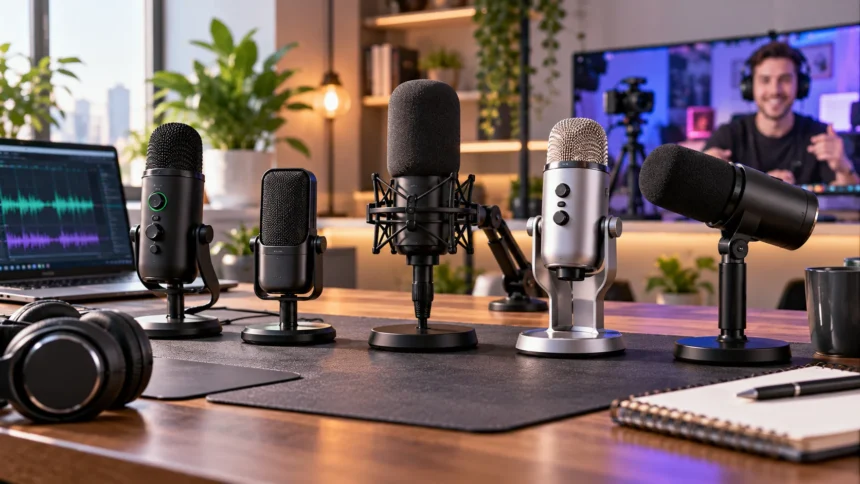
Clear audio can make a bigger difference to a podcast or online meeting than an expensive camera or complicated production setup. A good microphone makes your voice easier to understand, reduces distracting background sound, and creates a more professional impression. Whether you record weekly episodes or spend hours on Zoom and Teams calls, upgrading from a built-in laptop microphone can noticeably improve communication.
The best microphones for podcasts and meetings now cover a wide range of setups. Dynamic microphones are useful in untreated rooms because they tend to focus more closely on the speaker, while condenser microphones can capture greater vocal detail in quieter spaces. USB connectivity also makes high-quality audio accessible without requiring an external mixer or complicated studio equipment.
Your ideal microphone depends on your room, recording style, budget, and whether you need USB, XLR, or both. Current options from Shure, RØDE, Elgato, Sennheiser, and HyperX provide different combinations of voice processing, monitoring, connectivity, and recording flexibility. Understanding those differences makes choosing the right microphone much easier.
What to Look for in a Podcast and Meeting Microphone
Start with the microphone type and pickup pattern. Cardioid microphones primarily capture sound from the front while reducing sound arriving from other directions, making them practical for solo podcasts and video meetings. If you regularly record several people around one microphone, a model with selectable omnidirectional or bidirectional patterns may provide greater flexibility than a fixed cardioid design.
Connectivity is another major consideration. USB microphones plug directly into computers and usually require minimal setup, making them convenient for remote meetings and beginner podcasting. USB-and-XLR models provide more room for future upgrades because you can start by connecting directly to your laptop and later add an audio interface, mixer, or dedicated podcast production system.
Useful extras include direct headphone monitoring, physical mute controls, automatic gain adjustment, digital signal processing, and built-in pop filtering. These features can simplify recording and reduce the amount of correction needed later. However, microphone placement and room acoustics still matter, so do not assume advanced software can completely eliminate echo, keyboard noise, or poor positioning.
Shure MV7+ for Podcasts and Professional Calls
The Shure MV7+ is a dynamic microphone designed heavily around spoken voice, making it suitable for podcasts, streaming, voice recording, and professional online communication. It provides both USB-C and XLR connectivity, so beginners can connect directly to a computer while more advanced users can integrate it with an audio interface. This dual connection also makes the microphone easier to keep as your setup grows.
Shure includes several digital tools for making voice recording easier in imperfect environments. Voice Isolation Technology helps keep attention on the speaker, while Auto Level Mode adjusts gain based on factors such as distance and volume. The MV7+ also includes a real-time denoiser, digital plosive processing, a customizable LED touch panel, and a 3.5mm headphone output for monitoring.
These features make the MV7+ particularly practical for someone who records podcasts but also spends significant time in meetings. A dynamic capsule can be helpful when your home office contains keyboard clicks, fans, or other environmental sounds. The main consideration is positioning: it works best reasonably close to your mouth rather than sitting far away beside a monitor.
RØDE PodMic USB for Rich Spoken Voice
The RØDE PodMic USB is another strong choice for spoken-word recording. It is a dynamic broadcast microphone offering both USB-C and traditional XLR outputs, allowing it to work directly with computers or through professional audio hardware. RØDE specifically positions it for podcasting, streaming, voiceovers, gaming, and other speech-focused applications, giving it broad usefulness beyond a dedicated recording studio.
Its USB connection includes onboard digital processing powered by RØDE’s APHEX technology. Users can access tools including a noise gate, compressor, high-pass filtering, and additional voice-processing options through compatible RØDE software. The microphone also incorporates an internal pop filter and shockmount, while a headphone output provides zero-latency monitoring with convenient level control.
For podcast hosts, the PodMic USB provides a classic broadcast-style setup without making an audio interface mandatory on day one. For meetings, it can deliver a focused and polished voice when positioned correctly on a desktop stand or boom arm. Its substantial construction is reassuring, although you should use a stable stand capable of keeping the microphone comfortably positioned near your mouth.
Elgato Wave:3 MK.2 for Meetings, Streaming and Podcasts
The Elgato Wave:3 MK.2 is a current-generation USB condenser microphone built for creators who want strong software integration and easy setup. It uses a cardioid pickup pattern and connects through USB-C, making it straightforward to use with modern computers. Elgato introduced this updated generation with onboard processing aimed at podcasts, streams, voice communication, and other digital content workflows.
Wave:3 MK.2 includes Auto Gain, real-time monitoring, onboard DSP effects, and Clipguard 2.0 technology designed to manage sudden loud vocal peaks. It records at 24-bit/48kHz and works closely with Elgato’s Wave Link software. Wave Link can manage multiple audio sources, effects, monitoring routes, recording mixes, and communication applications from one software environment.
Because this is a condenser microphone, it can capture detailed and natural-sounding speech but may also reveal more of an untreated room than a close-positioned dynamic microphone. It therefore works particularly well for quiet offices and controlled recording environments. Streamers and remote workers already using Elgato products may also appreciate the deeper integration with the broader Wave and Stream Deck ecosystem.
Sennheiser Profile USB for Simple Plug-and-Play Audio
The Sennheiser Profile USB microphone takes a straightforward approach to computer audio. It combines a cardioid condenser capsule with USB-C connectivity, allowing users to connect without purchasing a separate interface. Sennheiser designed it for applications including podcasting, streaming, and voice-over recording, which also makes its control layout practical for meetings and everyday professional communication.
Physical controls are one of the Profile’s main advantages. Gain, headphone mix, and output volume can be adjusted directly from the microphone rather than requiring constant trips into software menus. This can be especially useful during long meetings, interviews, or recording sessions when you need to make a quick adjustment without interrupting the conversation.
As with other condenser microphones, the Profile benefits from thoughtful placement and a reasonably quiet environment. Keep it close enough to your voice that you do not need excessive gain, which can increase the amount of room sound being captured. Its plug-and-play design makes it particularly appealing to professionals who want better audio without turning their workspace into a complicated recording studio.
HyperX QuadCast 2 S for Flexible Recording Patterns
The HyperX QuadCast 2 S stands out because it provides four selectable polar patterns: cardioid, omnidirectional, bidirectional, and stereo. This gives it more recording flexibility than many fixed-cardioid USB microphones. Cardioid works naturally for one speaker, while bidirectional or omnidirectional modes can be useful in certain interview, discussion, or shared-table situations when microphone placement is carefully managed.
HyperX also includes a detachable shock mount, tap-to-mute control, multifunction adjustment knob, and customizable lighting. The microphone supports recording settings up to 32-bit/192kHz according to HyperX, although podcast and meeting users generally do not need to chase extremely high sample rates to achieve clear spoken audio. Correct positioning and room control usually have a greater practical impact.
The QuadCast 2 S makes particular sense for users who need one USB microphone for gaming, meetings, streaming, and occasional podcast recording. Its selectable patterns offer experimentation that fixed-pattern microphones cannot provide. However, using an omnidirectional pattern in a noisy or echo-filled room will naturally capture more of the surrounding environment, so choose the mode according to the situation.
Dynamic vs Condenser Microphones for Voice
Dynamic microphones are often practical for podcasting from bedrooms, offices, and other untreated spaces. They generally require you to speak relatively close to the capsule and tend to capture less distant room detail than sensitive condenser models. This can help reduce the prominence of computer fans, reflections, keyboard sounds, air-conditioning noise, and other everyday distractions in recordings.
Condenser microphones typically offer greater sensitivity and can capture detailed vocal characteristics very effectively. That can produce a natural, open sound when your room is quiet and reasonably controlled. The disadvantage is that the same sensitivity may also reveal echo, nearby conversations, street noise, mechanical keyboards, or other sounds you would rather keep out of your podcast or meeting.
Neither microphone type is automatically better in every situation. If your recording room has noticeable environmental noise, a close-positioned dynamic model such as the Shure MV7+ or RØDE PodMic USB may be easier to manage. If your room is quiet and you value detail, a condenser such as the Wave:3 MK.2 or Sennheiser Profile can work extremely well.
USB vs XLR Microphones: Which Should You Choose?
USB microphones are ideal when simplicity matters. They contain the components needed to convert your voice into a digital signal and send it directly to a computer, eliminating the need for a separate audio interface. This makes them convenient for Zoom meetings, Microsoft Teams, remote interviews, solo podcasts, online lessons, gaming, and home-office setups where minimal equipment is preferred.
XLR microphones require additional hardware, usually an audio interface or mixer, but offer greater flexibility when building larger recording systems. Podcasters running several microphones can route each speaker through separate interface channels and control levels individually. XLR equipment also makes it easier to change microphones, preamps, mixers, or other components without replacing your entire recording workflow.
Hybrid microphones provide a practical middle ground. Models such as the Shure MV7+ and RØDE PodMic USB allow you to begin with straightforward USB recording and move to XLR equipment later. That makes them particularly attractive if you are starting a podcast now but expect to add co-hosts, dedicated production hardware, or a more advanced recording space in the future.
Creating a Better Podcast and Video Meeting Setup
Good microphone audio becomes even more effective when the rest of your setup supports clear communication. Position your computer screen around a comfortable viewing height, use headphones when echo or feedback becomes a problem, and keep the microphone within an appropriate speaking distance. A boom arm can help place the microphone closer without consuming valuable keyboard or desk space.
For video meetings, audio should work together with clear visual presentation. Good lighting and a dedicated camera can make client calls, interviews, remote training, and presentations feel much more polished. If you are improving your complete communication setup, comparing the best webcams can help you pair clearer video with your upgraded microphone.
Try to keep noisy equipment away from the microphone whenever possible. Desktop computers, laptop cooling fans, air conditioners, speakers, and mechanical keyboards can become surprisingly noticeable in sensitive recordings. Soft furnishings such as curtains, rugs, couches, and bookshelves may also reduce harsh reflections, helping speech sound less hollow without requiring a professional acoustic treatment project.
Microphone Placement and Recording Best Practices
Place a solo microphone reasonably close to your mouth instead of leaving it several feet away. With many spoken-word microphones, a distance of several inches provides a stronger voice signal and allows you to use less gain. Speak slightly across the microphone rather than directly blasting air into the capsule when plosive sounds such as “P” and “B” become noticeable.
Set gain so your normal speaking voice is clear without frequently clipping during louder sentences. Increasing gain excessively does not simply make your voice better; it may also amplify room noise and reflections. Direct headphone monitoring is valuable during podcast recording because it lets you identify mouth noises, background sounds, poor positioning, or changing speaking distance before an entire episode has been recorded.
Finally, record a short test before important podcasts, interviews, presentations, or meetings. Listen through headphones and check microphone selection inside the software you plan to use. A thirty-second test can catch the wrong input device, excessive gain, background noise, loose connections, or muted audio before those problems affect an hour-long recording or an important client conversation.
Conclusion
The best microphone for podcasts and meetings depends primarily on your room, workflow, and preferred level of complexity. Shure’s MV7+ and the RØDE PodMic USB provide versatile dynamic designs with both USB and XLR connectivity. They are particularly useful when spoken voice and practical noise management matter more than capturing every subtle detail of the room.
Elgato’s Wave:3 MK.2 provides powerful software integration and onboard processing, while the Sennheiser Profile USB offers straightforward controls for people who want simple computer audio. The HyperX QuadCast 2 S adds multiple pickup patterns, making it useful when one microphone needs to handle several different recording situations.
Whatever microphone you choose, proper positioning will often improve results more than chasing technical specifications. Keep the microphone appropriately close, use sensible gain, control background sound, and monitor recordings when possible. A well-positioned midrange microphone in a suitable room can produce clearer podcast episodes and meetings than expensive equipment used with poor technique.
FAQs
What type of microphone is best for podcasting?
Dynamic cardioid microphones are often excellent for spoken-word podcasts, particularly in untreated rooms. Condenser microphones can provide greater detail when the recording space is quiet and controlled.
Is a USB microphone good enough for professional meetings?
Yes. A quality USB microphone can deliver clear, professional voice quality for Zoom, Teams, Google Meet, and similar platforms without requiring an audio interface or complicated recording equipment.
Should I use a dynamic or condenser microphone for meetings?
A dynamic microphone can be useful in noisy offices, while a condenser may sound more natural in a quiet room. Choose according to your environment, microphone position, and preferred working distance.
Do I need an XLR microphone for a podcast?
No. USB microphones can produce excellent podcast audio and are easier for beginners to configure. XLR becomes more useful when building multi-microphone setups or adding professional interfaces and mixers.
How close should a microphone be for podcast recording?
Many voice microphones perform best when positioned several inches from the speaker, although the ideal distance varies by model. Staying relatively close usually helps improve vocal presence while reducing the need for excessive gain.